Installing a 40-ton overhead crane is a significant project that can greatly enhance your facility’s material handling capabilities. Whether used in manufacturing, construction, or heavy industrial applications, a properly installed overhead crane ensures efficient, safe, and reliable operations. However, installing such a massive piece of equipment requires meticulous planning and execution to ensure smooth integration into the facility.
In this guide, we will outline the steps and key considerations for the successful installation of a 40-ton overhead crane.
1. Pre-Installation Planning
Before the installation process begins, careful planning is essential. This stage sets the foundation for a smooth and efficient installation and includes multiple steps:
- Site Assessment: Conduct a comprehensive assessment of the site where the crane will be installed. Evaluate the structural integrity of the building, including the walls, columns, and foundations. Ensure that the structure can support the weight of the crane and its dynamic loads when in operation.
- Clearance and Layout Planning: Measure the available headroom, floor space, and operating area. This is crucial, as a 40-ton overhead crane requires adequate clearance to move without obstructions. Consider the crane’s span, lifting height, and travel path to ensure there is enough room for safe operation.
- Permits and Regulations: Obtain any necessary permits or approvals from local regulatory bodies. Depending on your location, Aicrane overhead crane installation may be subject to building codes, safety regulations, and environmental guidelines. Ensure compliance with standards such as OSHA (in the U.S.) or other local safety agencies.
- Crane Specifications Review: Before moving forward with the installation, review the specific crane model’s requirements. This includes understanding the crane’s structural dimensions, power needs, control systems, and special features, such as remote controls or load limiters. Ensuring the facility is prepared for these specifications will minimize delays during installation.
2. Preparation of the Site
Once the planning is complete, the next step is to prepare the site for overhead crane installation. Proper site preparation helps prevent delays and ensures that the installation team can work efficiently.
- Foundation and Runway Rail Installation: One of the critical steps in site preparation is ensuring that the foundation and runway system are ready. The runway beams or tracks on which the crane will travel must be installed and leveled. These beams need to be aligned perfectly to avoid misalignment issues that could affect the crane’s performance.
- Power Supply Installation: Ensure that the power supply required for the 40-ton overhead crane is available. Electrical wiring and power connections should be set up in advance. Typically, overhead cranes require three-phase power, and the electrical setup must comply with the crane’s specific voltage requirements.
- Safety and Access Control: Mark the installation area as a restricted zone to ensure that unauthorized personnel do not enter during the installation process. Additionally, plan for safety measures, such as barriers, warning signs, and emergency procedures to protect workers during the installation.
3. Assembling the Crane Components
After the site is prepared, the next step is assembling the crane’s main components. The crane usually arrives in parts, including the bridge, hoist, trolley, and controls. Here’s how the assembly process typically unfolds:
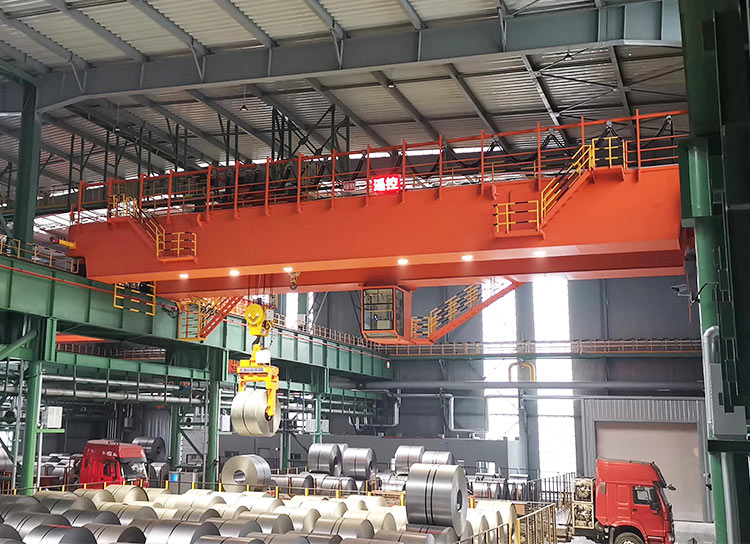
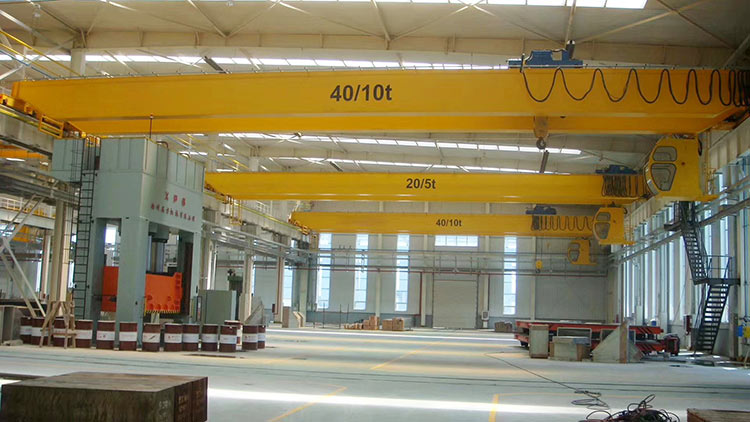
- Bridge and Girders Assembly: The bridge, which spans across the width of the facility, is assembled first. If you’re installing a double girder overhead crane (common for 40-ton capacities), two girders are mounted parallel to each other. These girders carry the load and provide structural integrity for the crane.
- Trolley and Hoist Assembly: The hoist is responsible for lifting the load, while the trolley moves the hoist along the bridge. These components are installed next, and they should be carefully aligned and connected to the bridge. Ensure that the hoist can smoothly move along the trolley and that all connections are secure.
- Control Systems Installation: Install the control system, whether it’s a pendant control, a radio remote control, or a cabin control. The controls must be configured correctly to ensure safe and precise crane operation. Additionally, set up any automated or semi-automated control features, such as variable speed drives or limit switches.
4. Erecting and Mounting the Crane
With the crane assembled, it’s time to mount the crane onto the runway system and erect it within the facility. This phase requires precision and safety, as the heavy components need to be lifted into place.
- Lifting the Crane: A mobile crane or other heavy-duty lifting equipment is typically required to lift the assembled crane components onto the runway beams. This process must be done slowly and carefully to avoid any damage to the crane or the building structure. Ensure that all components are securely fastened before proceeding.
- Runway Rail Alignment: Once the crane is mounted, align the runway rails and ensure they are level. Misalignment can cause the crane to derail or malfunction during operation. Perform a test run to verify that the trolley and hoist move smoothly along the runway.
- Secure Fastening: After the crane is mounted and aligned, double-check all fastening points. Bolts, connections, and joints should be tightened according to the manufacturer’s specifications. This ensures that the crane is stable and safe to operate.
5. Electrical and Mechanical Connections
Once the crane is mounted and secured, it’s time to connect the electrical and mechanical systems. This step ensures that the crane is operational and ready for testing.
- Electrical Wiring: Connect the crane to the facility’s power supply, following all safety protocols. Ensure that the electrical connections are secure and that the crane’s motors, hoist, and trolley are receiving power correctly.
- Testing the Control Systems: Test the control systems to ensure that the crane responds properly to commands. This includes testing the hoist’s lifting and lowering functions, the trolley’s movements, and the crane’s bridge travel. Make sure that all emergency stop buttons and limit switches are functioning correctly.
6. Load Testing and Calibration
Before the crane can be put into regular operation, it must undergo load testing and calibration. This is a critical safety step to ensure that the crane can handle its rated capacity without any issues.
- Load Testing: Load testing involves lifting a test load that exceeds the crane’s rated capacity (usually 125% of its maximum load) to ensure it operates safely under maximum stress. The test load is gradually lifted, and all components are monitored for any signs of strain or malfunction.
- Adjustments and Calibration: Based on the results of the load test, adjustments may be necessary. This could include recalibrating the hoist’s speed, fine-tuning the control systems, or adjusting the tension of the runway rails. Ensure that the crane operates smoothly and safely at its full capacity before certifying it for use.
7. Post-Installation Inspection and Certification
After the crane has passed all tests and been calibrated, conduct a final inspection to ensure all installation steps have been completed correctly. At this stage, a qualified inspector should review the installation and issue a certification confirming that the crane meets all safety and performance standards.
- Operator Training: Before the crane is put into regular operation, provide comprehensive training for all crane operators. This training should cover safe operation, emergency procedures, and routine maintenance tasks.
8. Maintenance Planning
A proper maintenance plan is essential to prolong the life of the crane and ensure continued safe operation. After installation, schedule regular inspections and maintenance tasks, including checking the hoist, trolley, and electrical systems.
Conclusion
Installing a 40-ton overhead crane is a complex process that requires careful planning, skilled assembly, and rigorous testing. By following the steps outlined in this guide, you can ensure that your crane is installed safely and operates efficiently. From site preparation and assembly to final testing and certification, each stage is crucial for the crane’s long-term success in your facility.